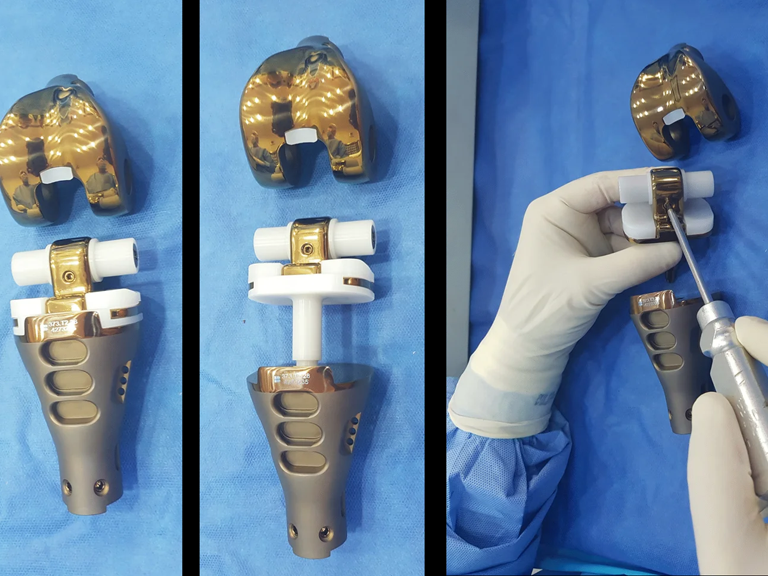
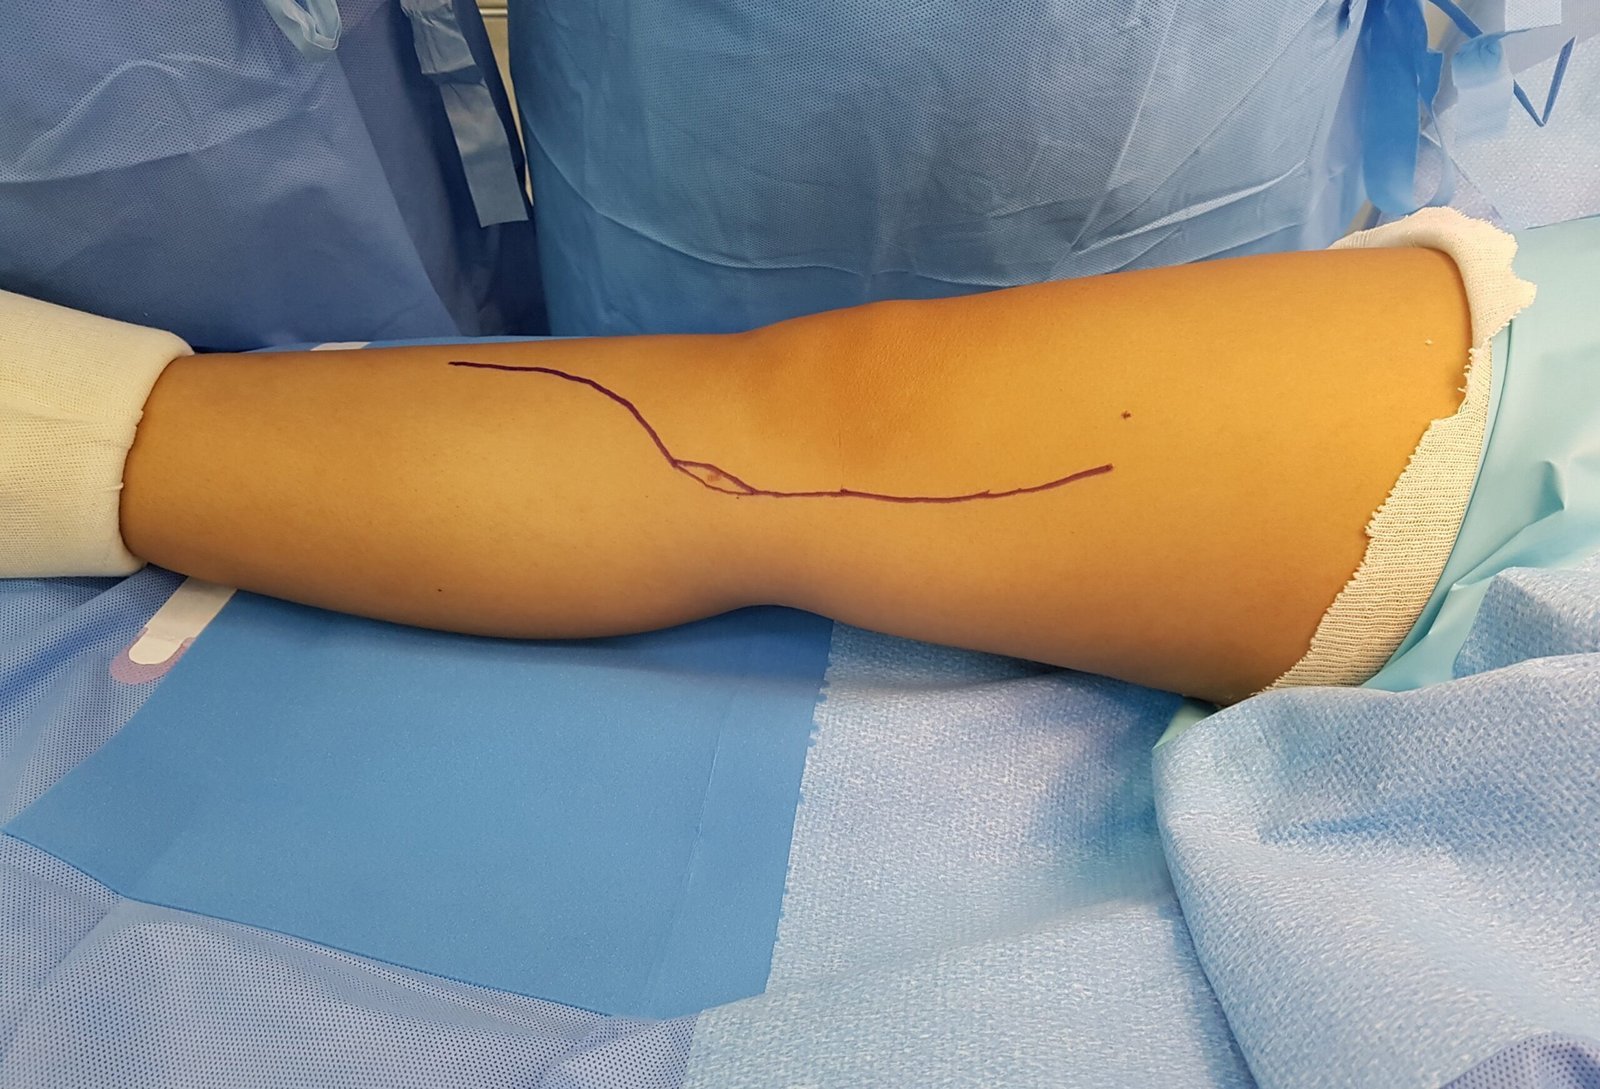
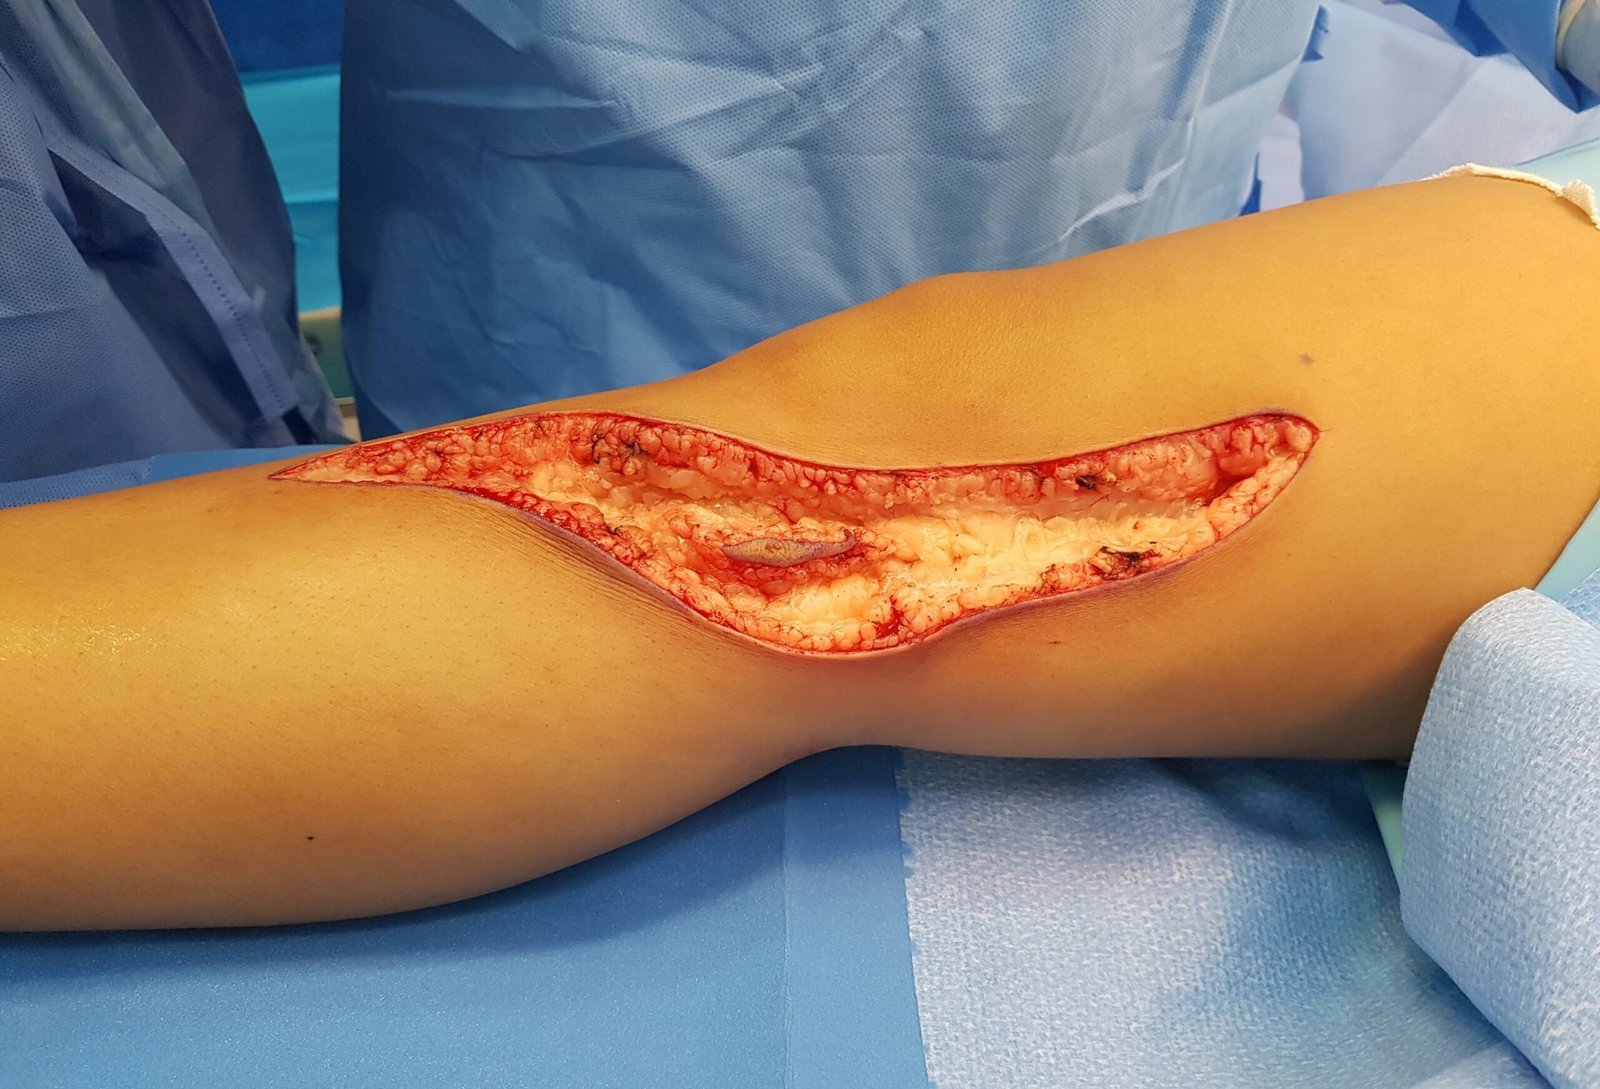
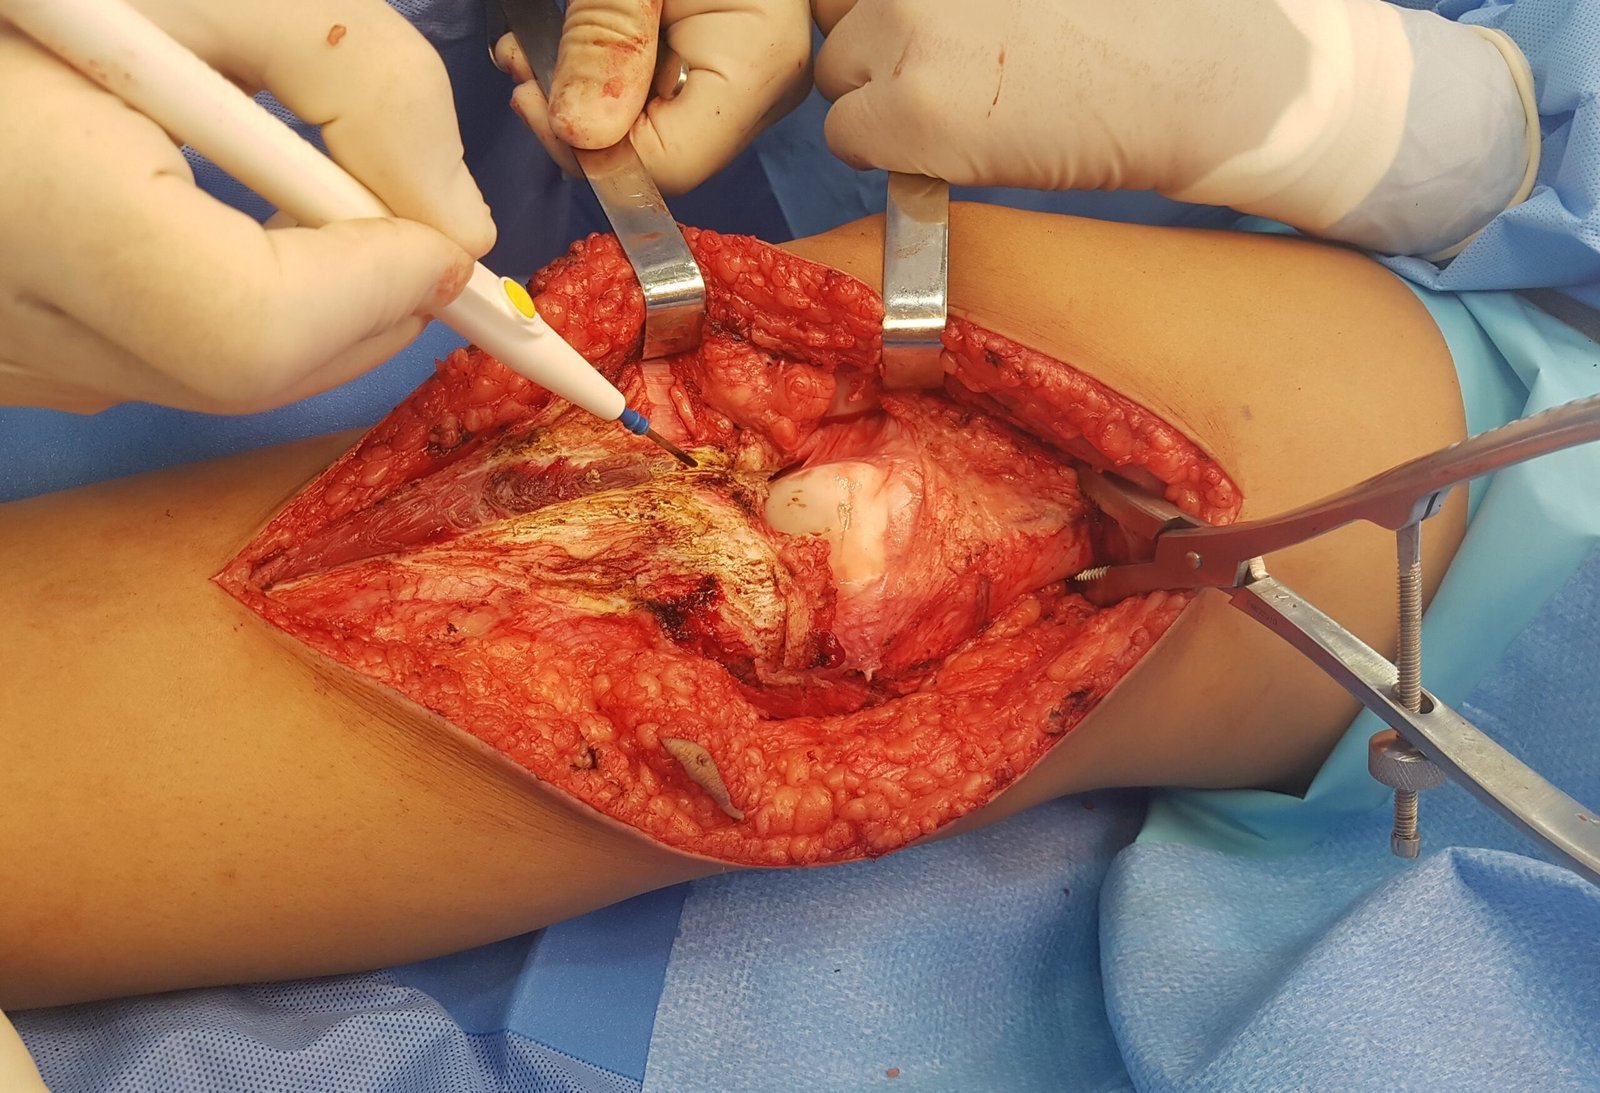
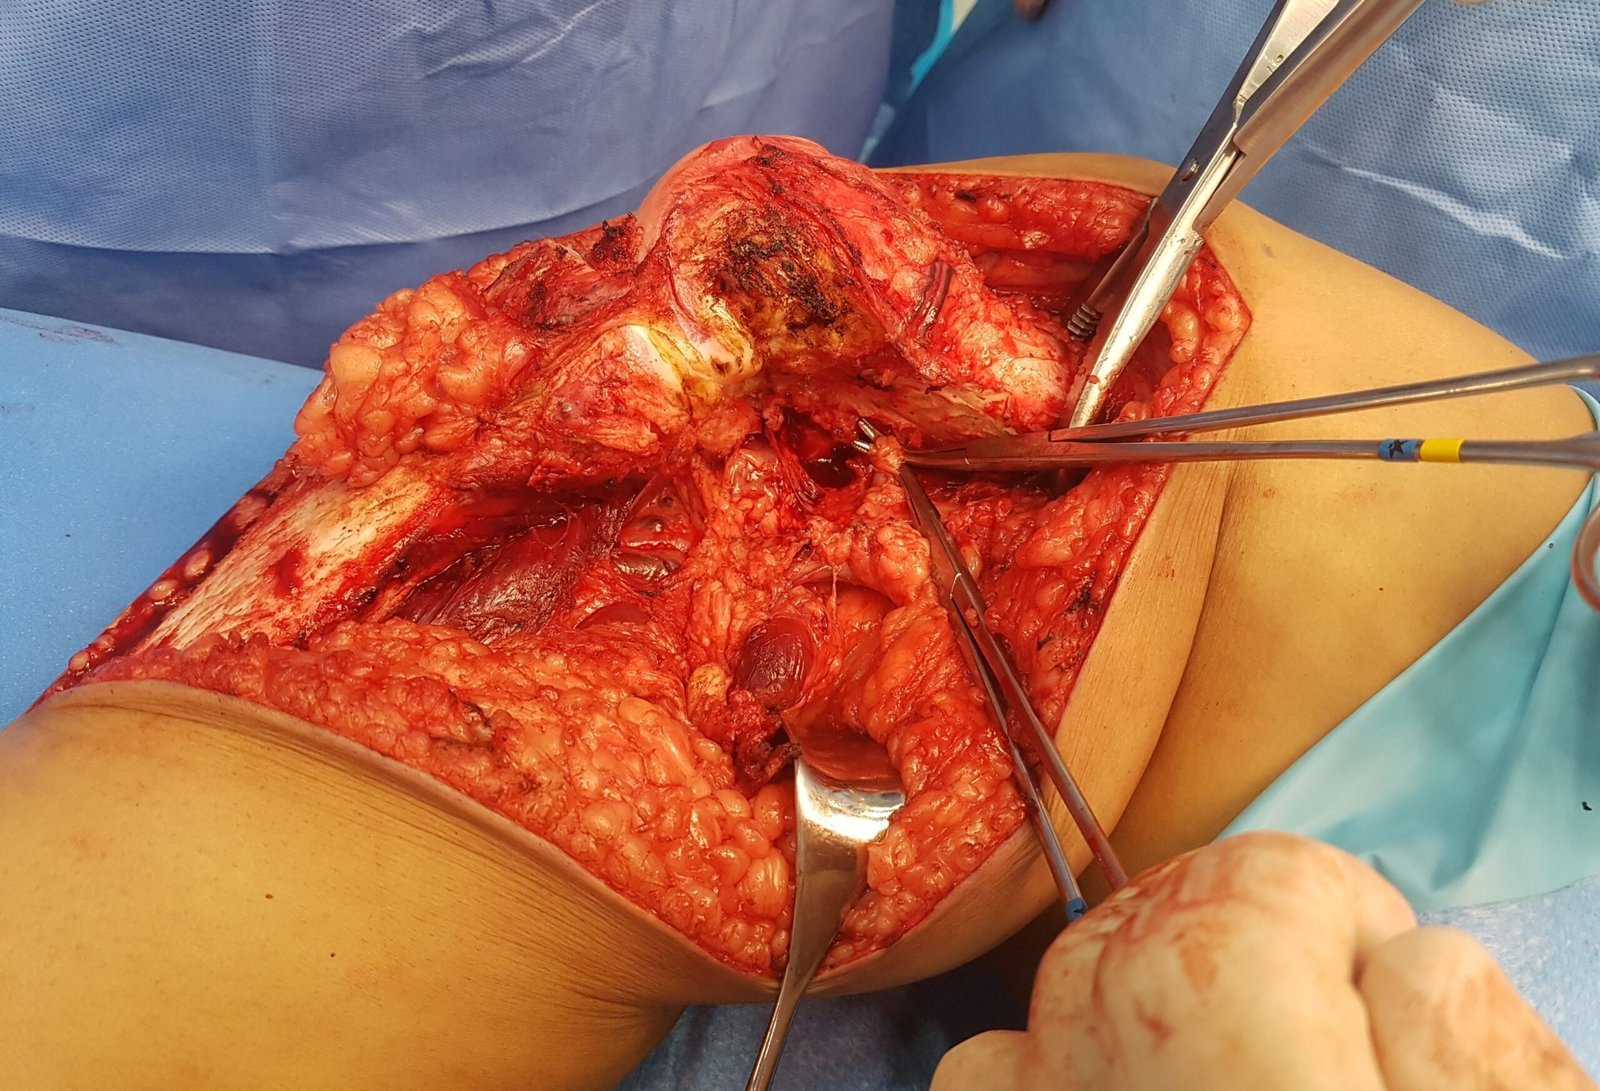
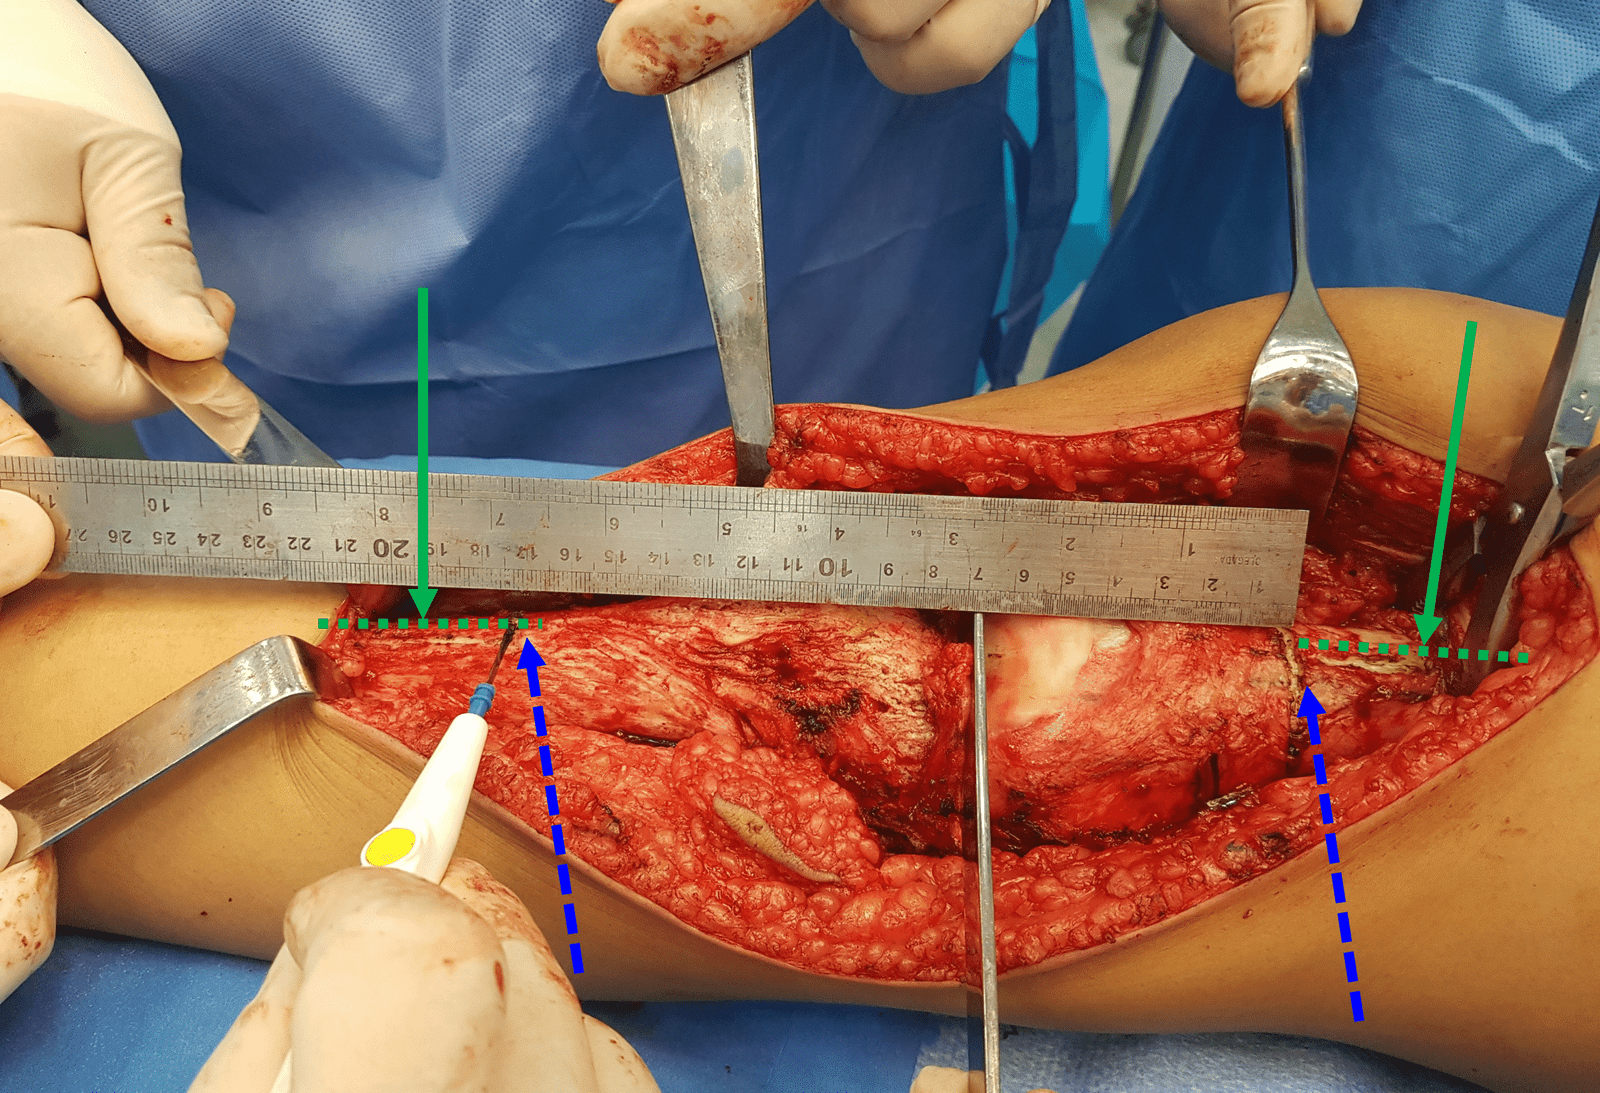
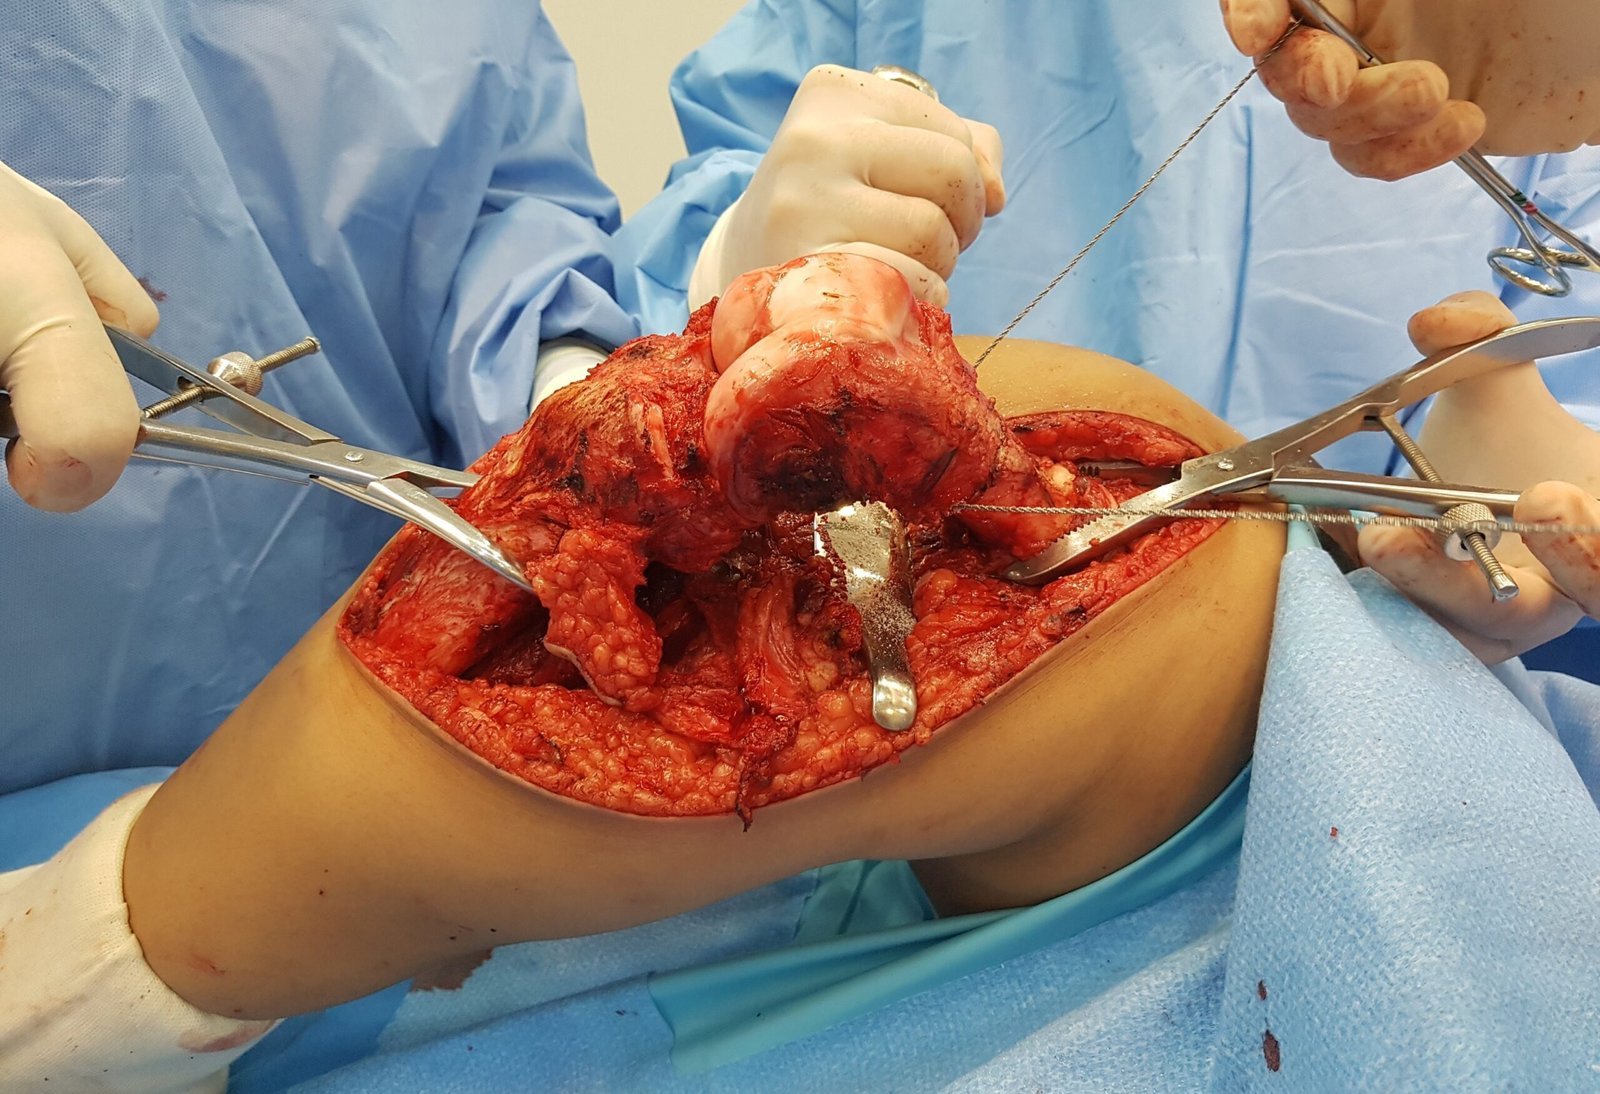
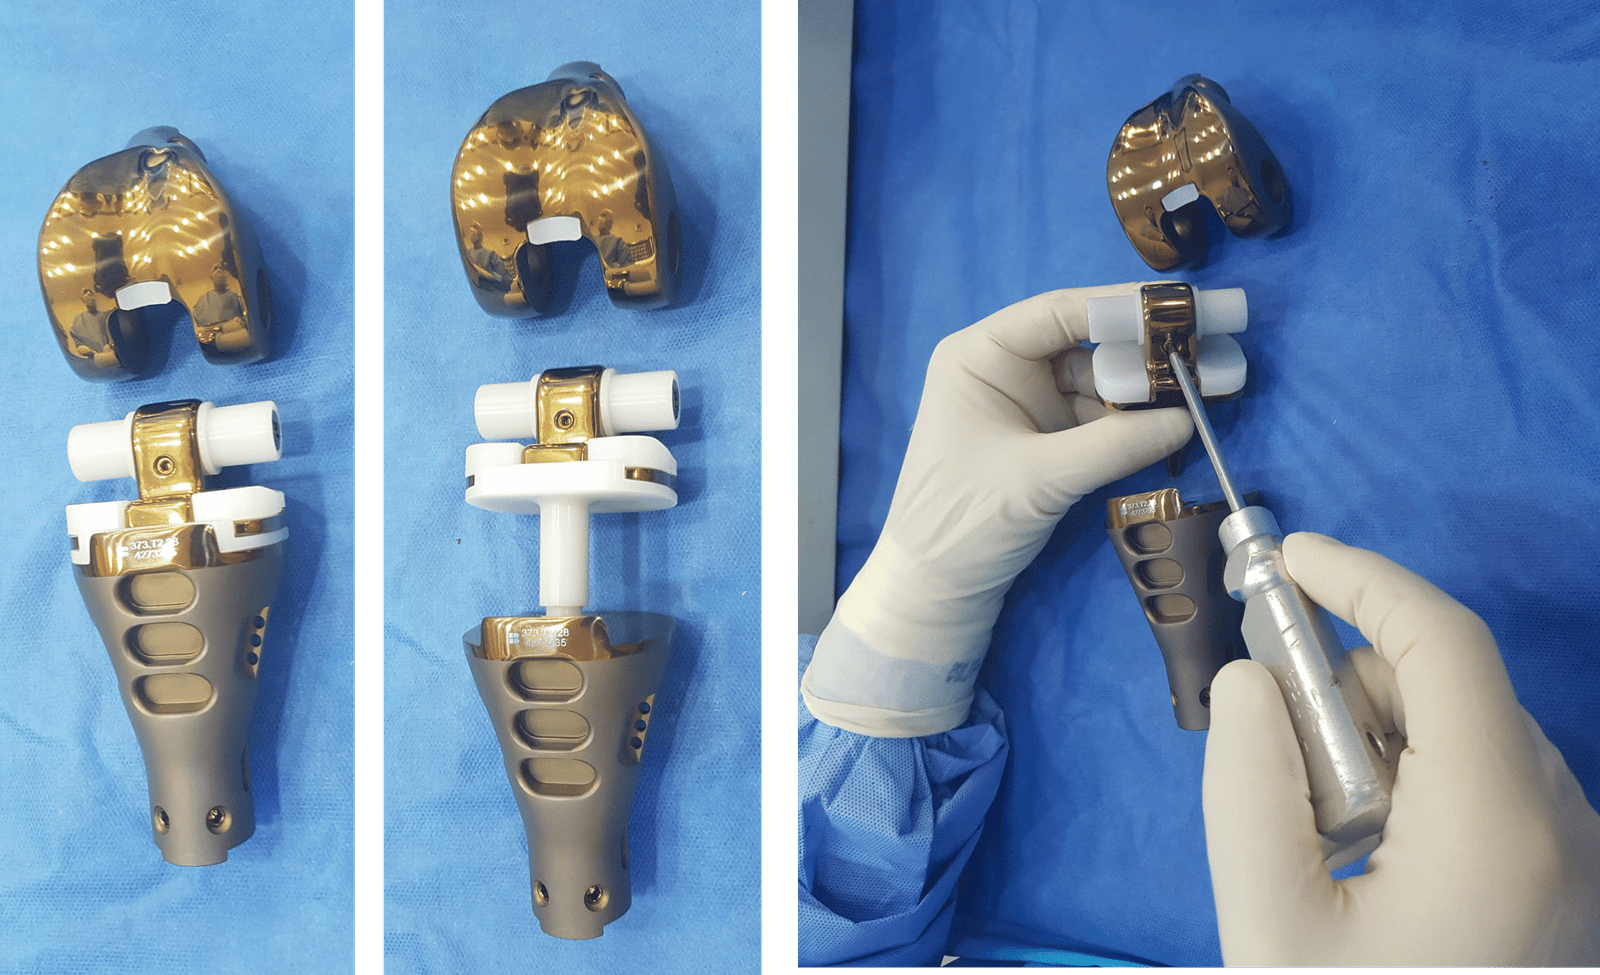
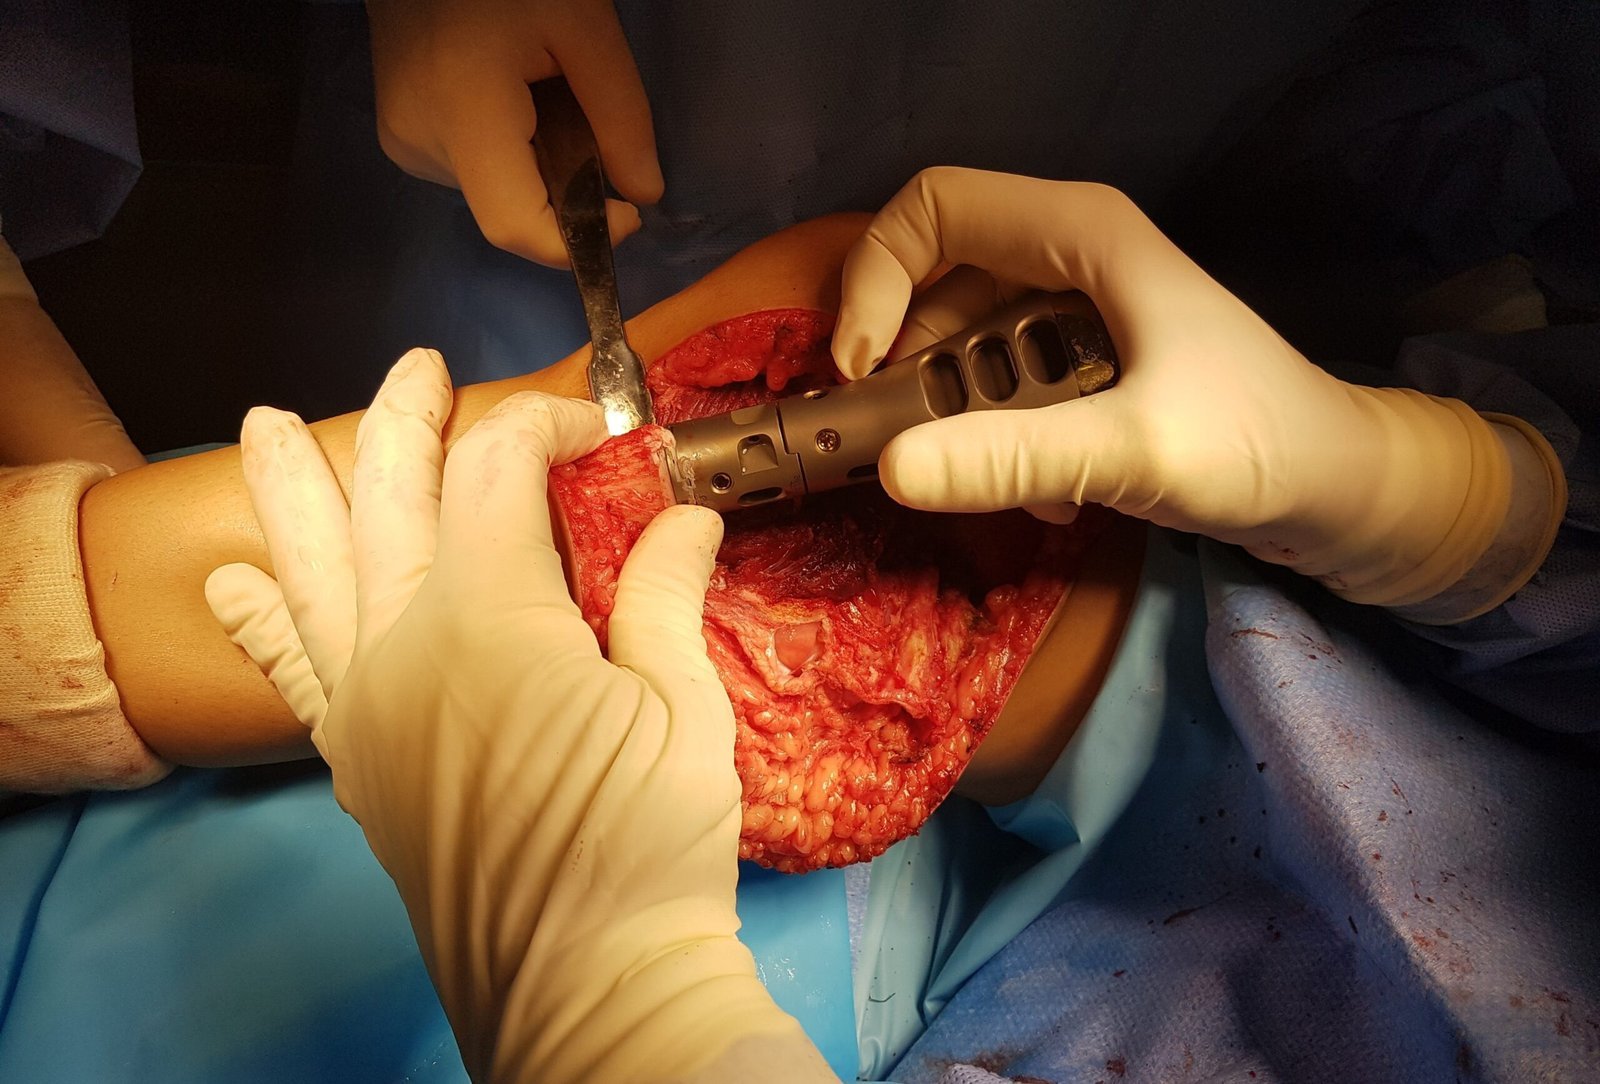
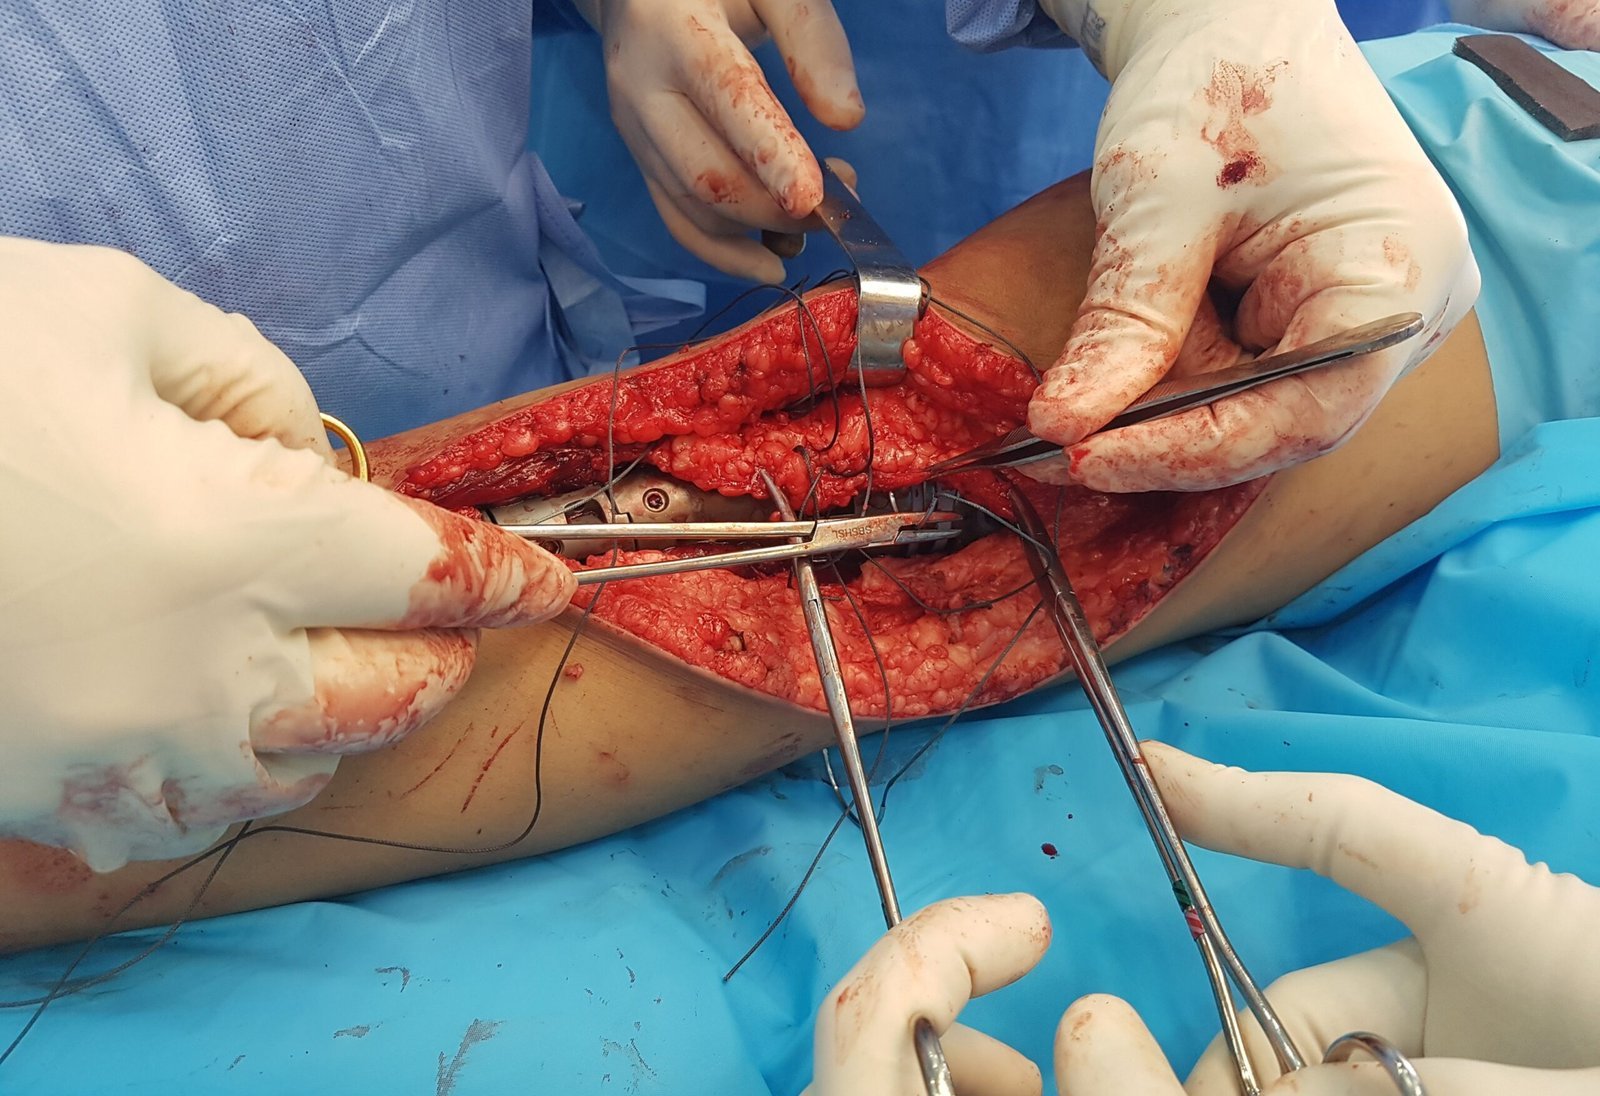
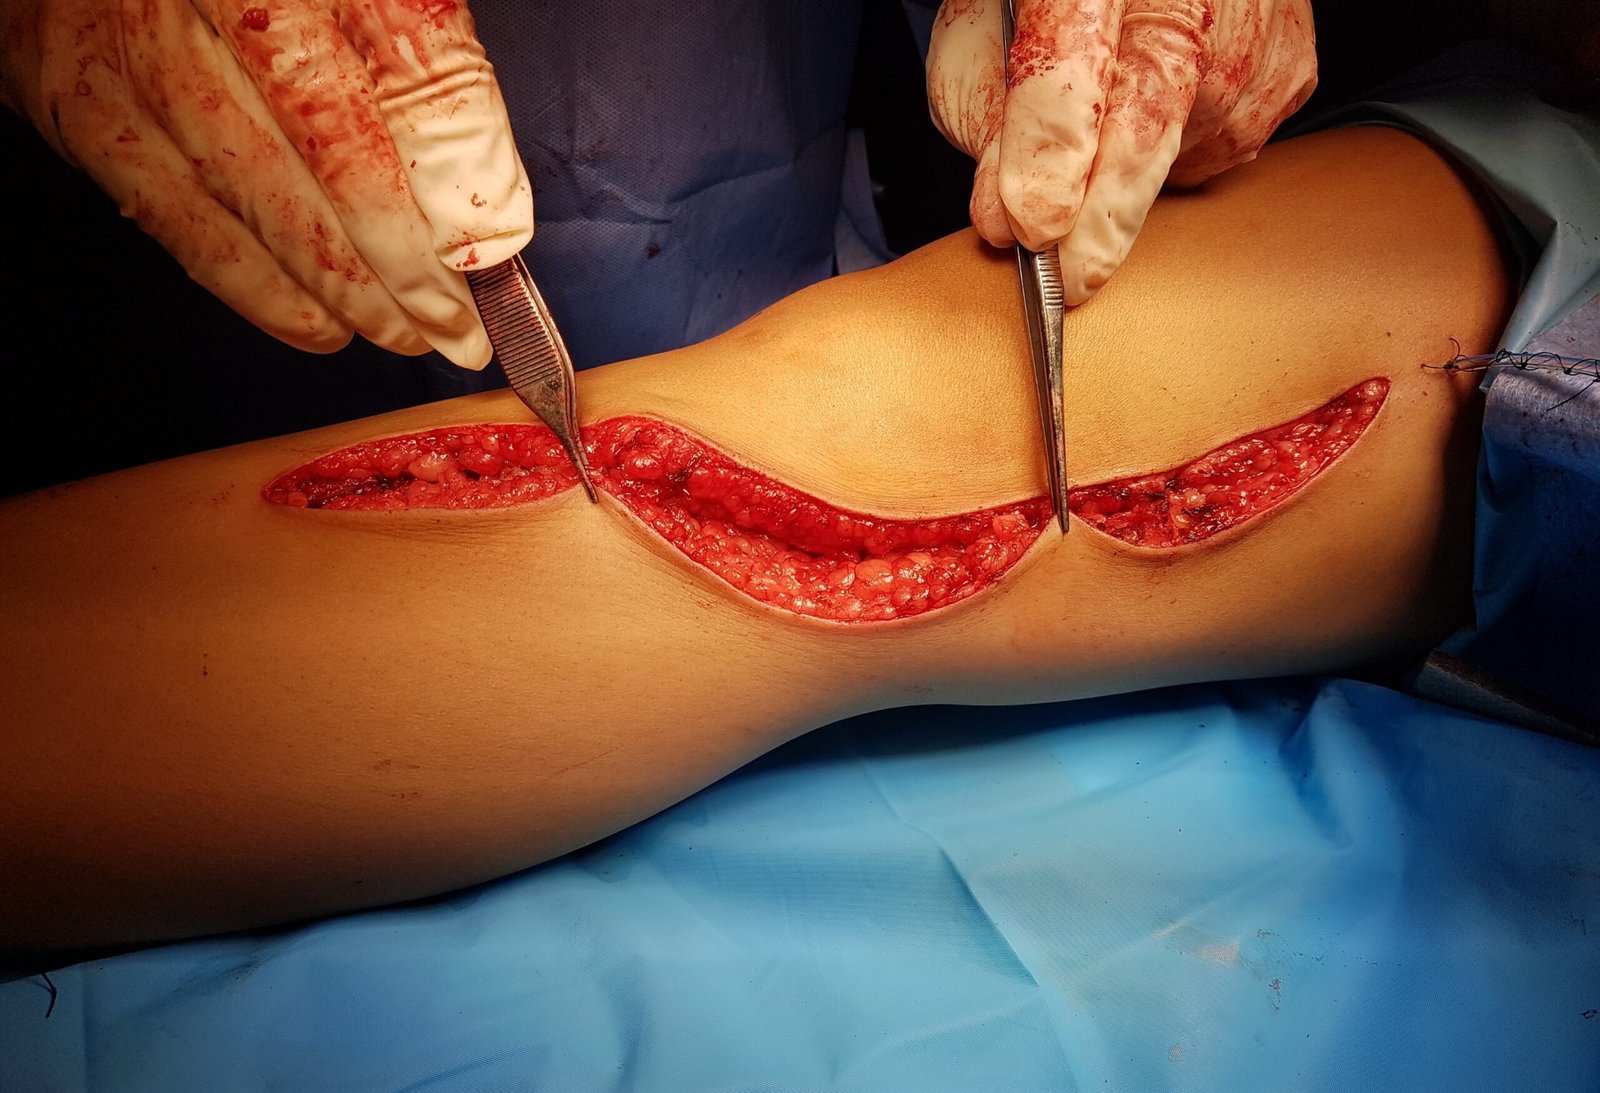
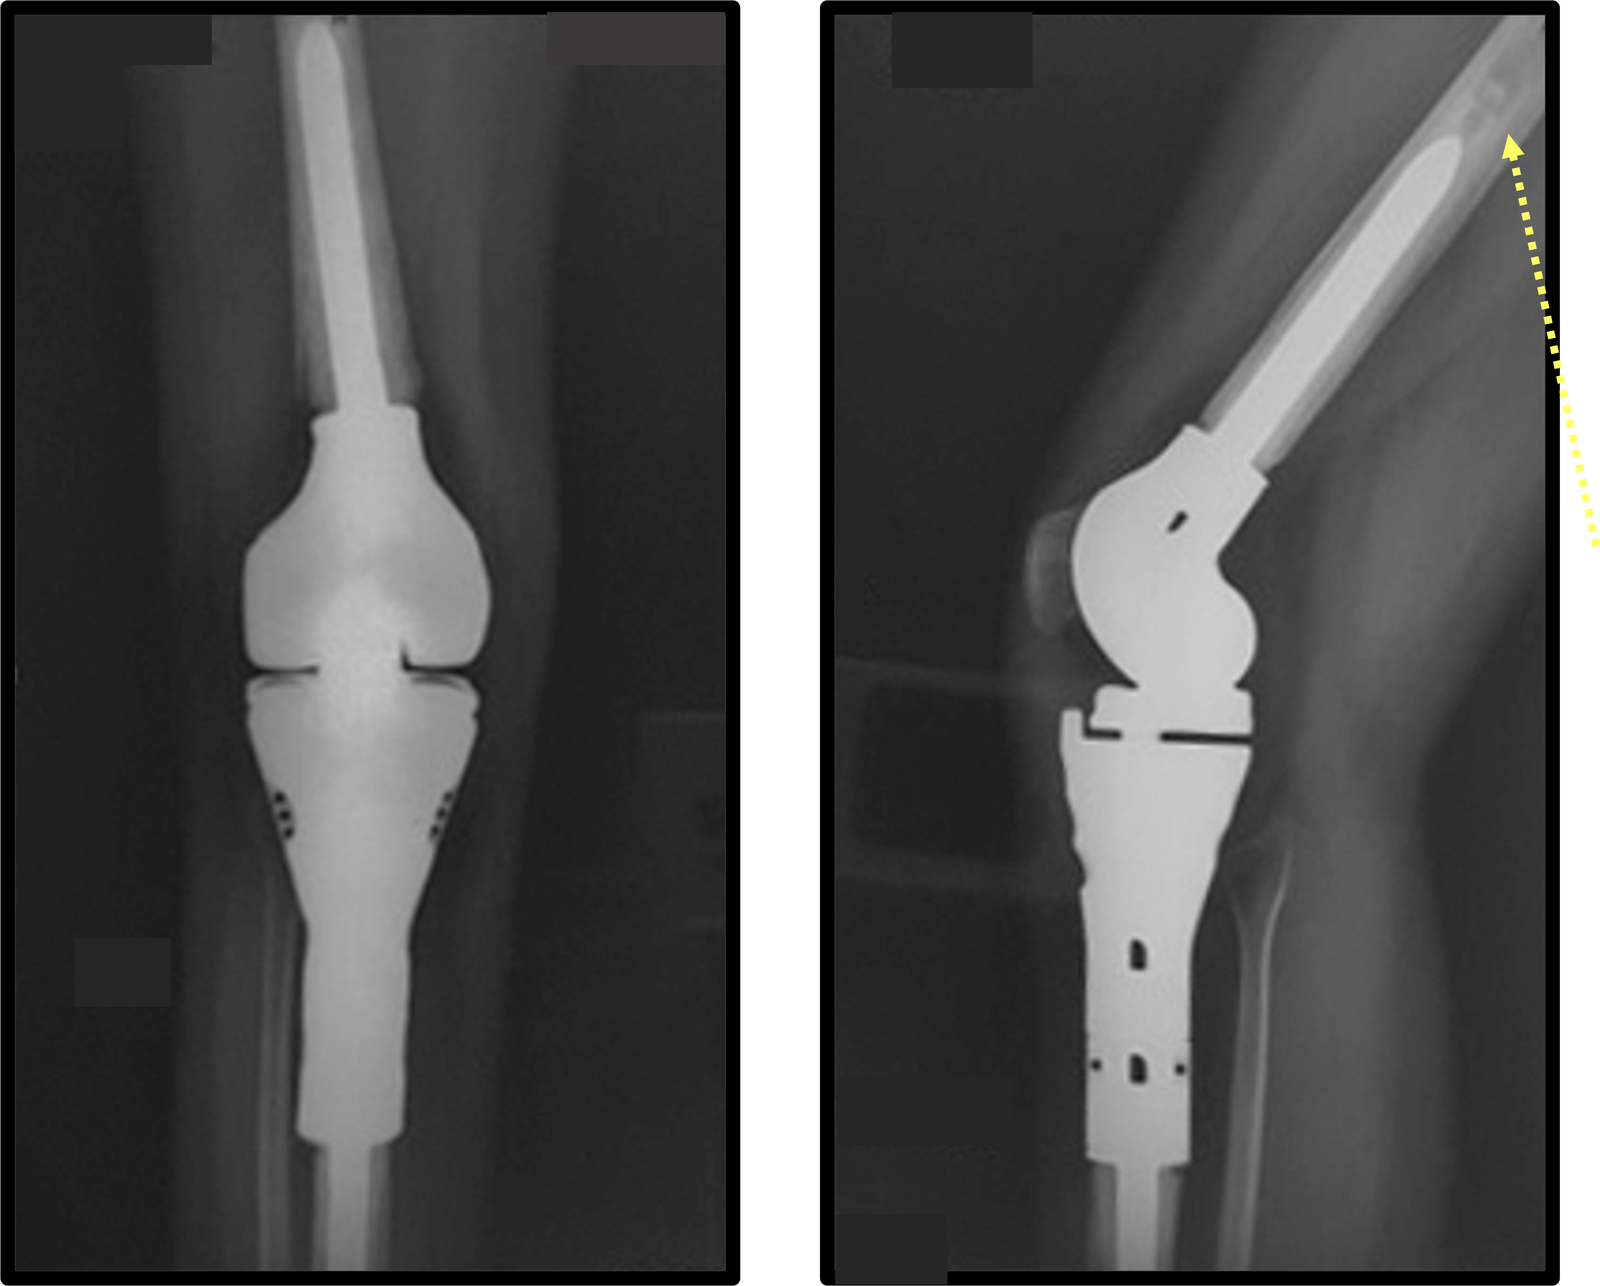
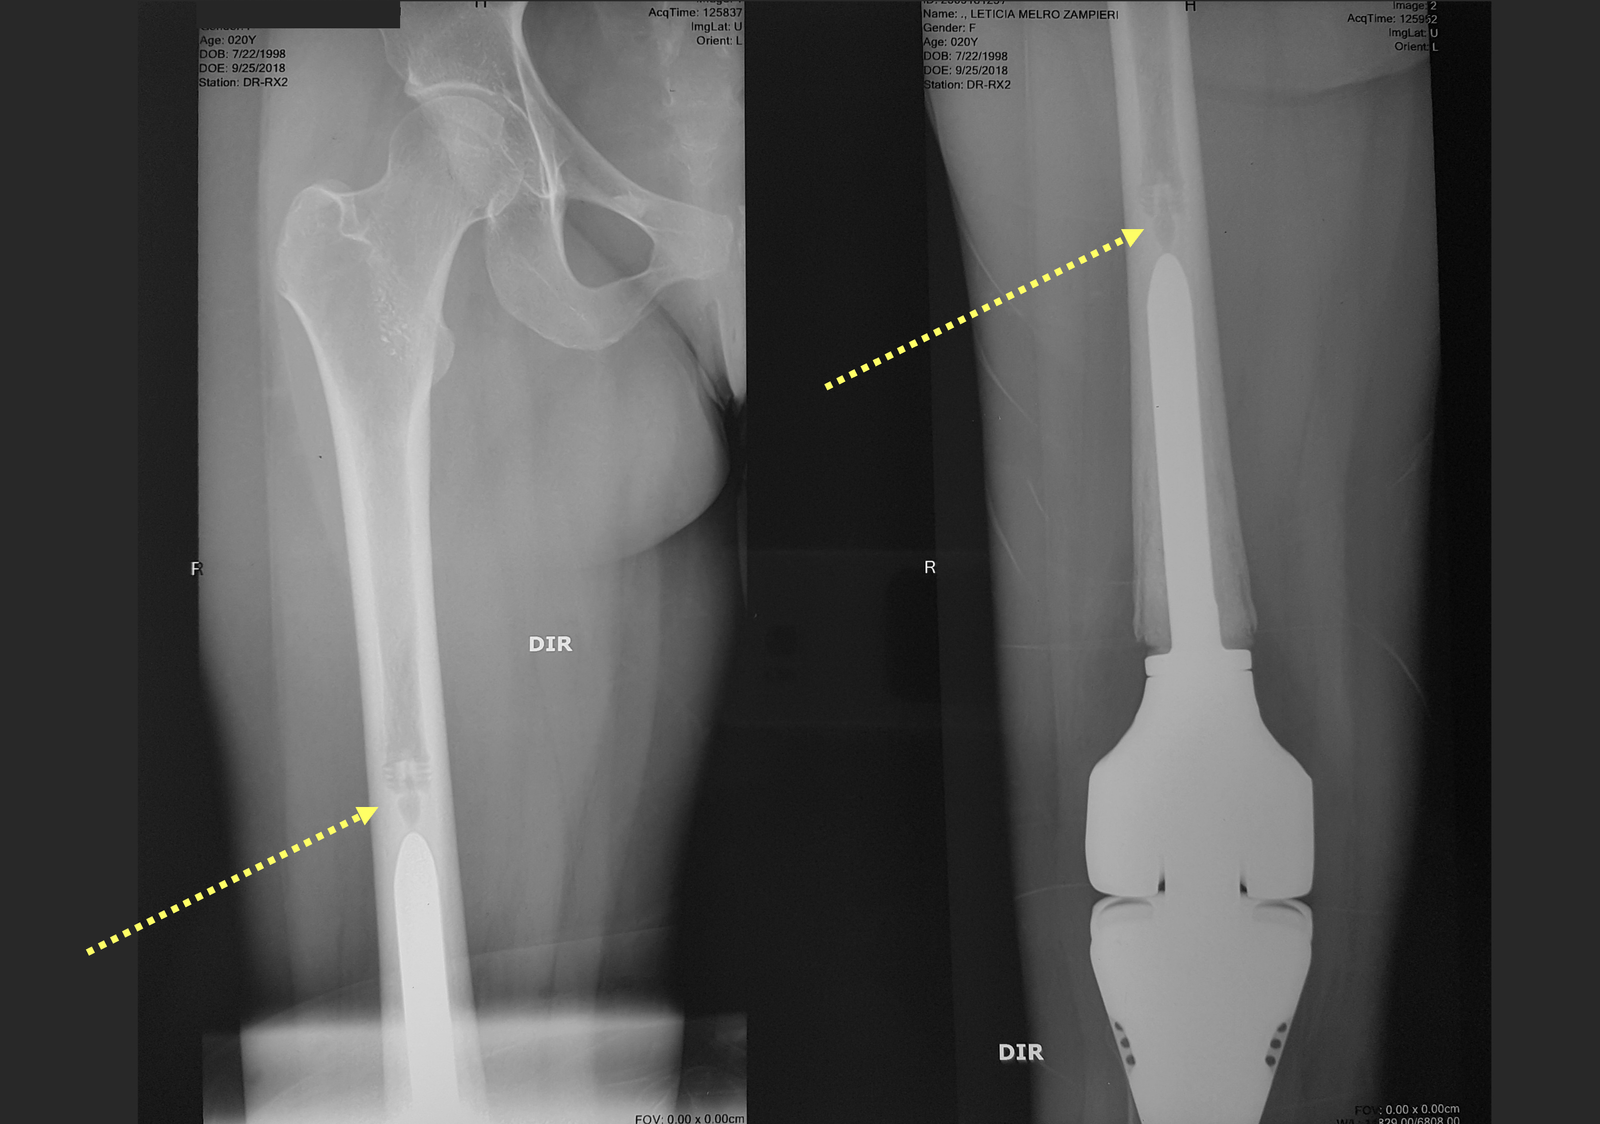
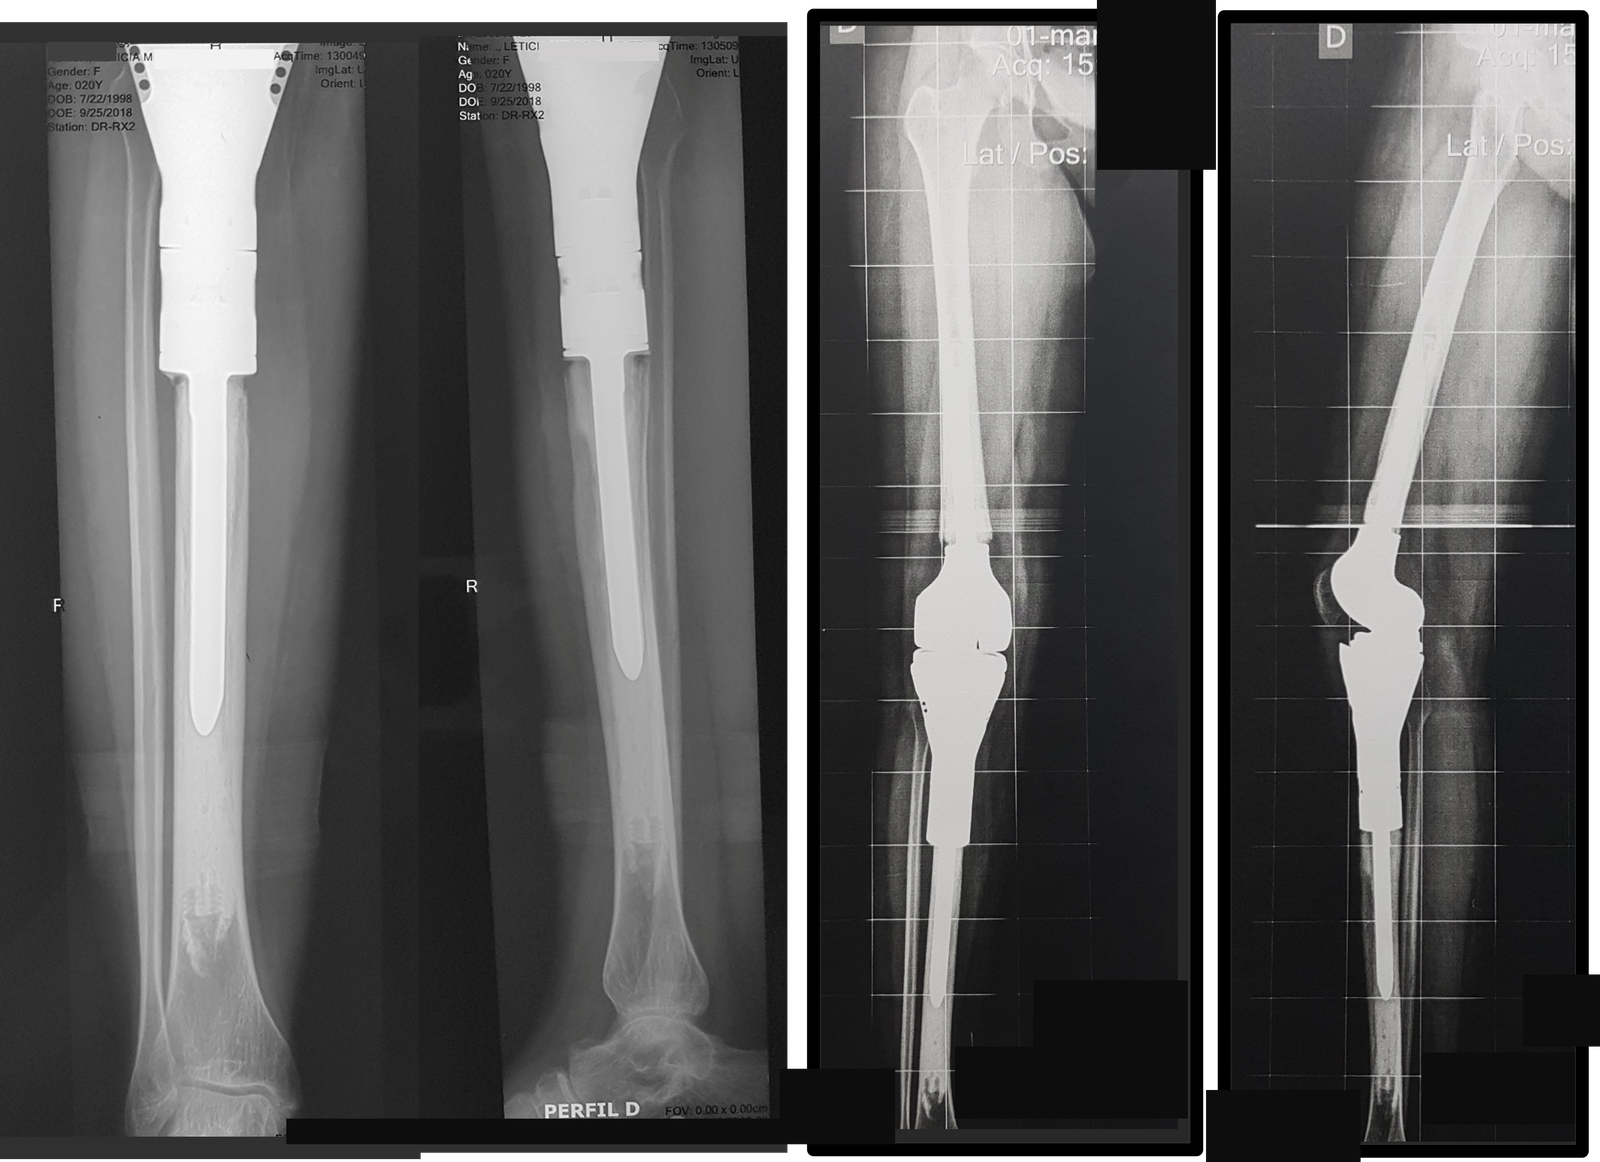
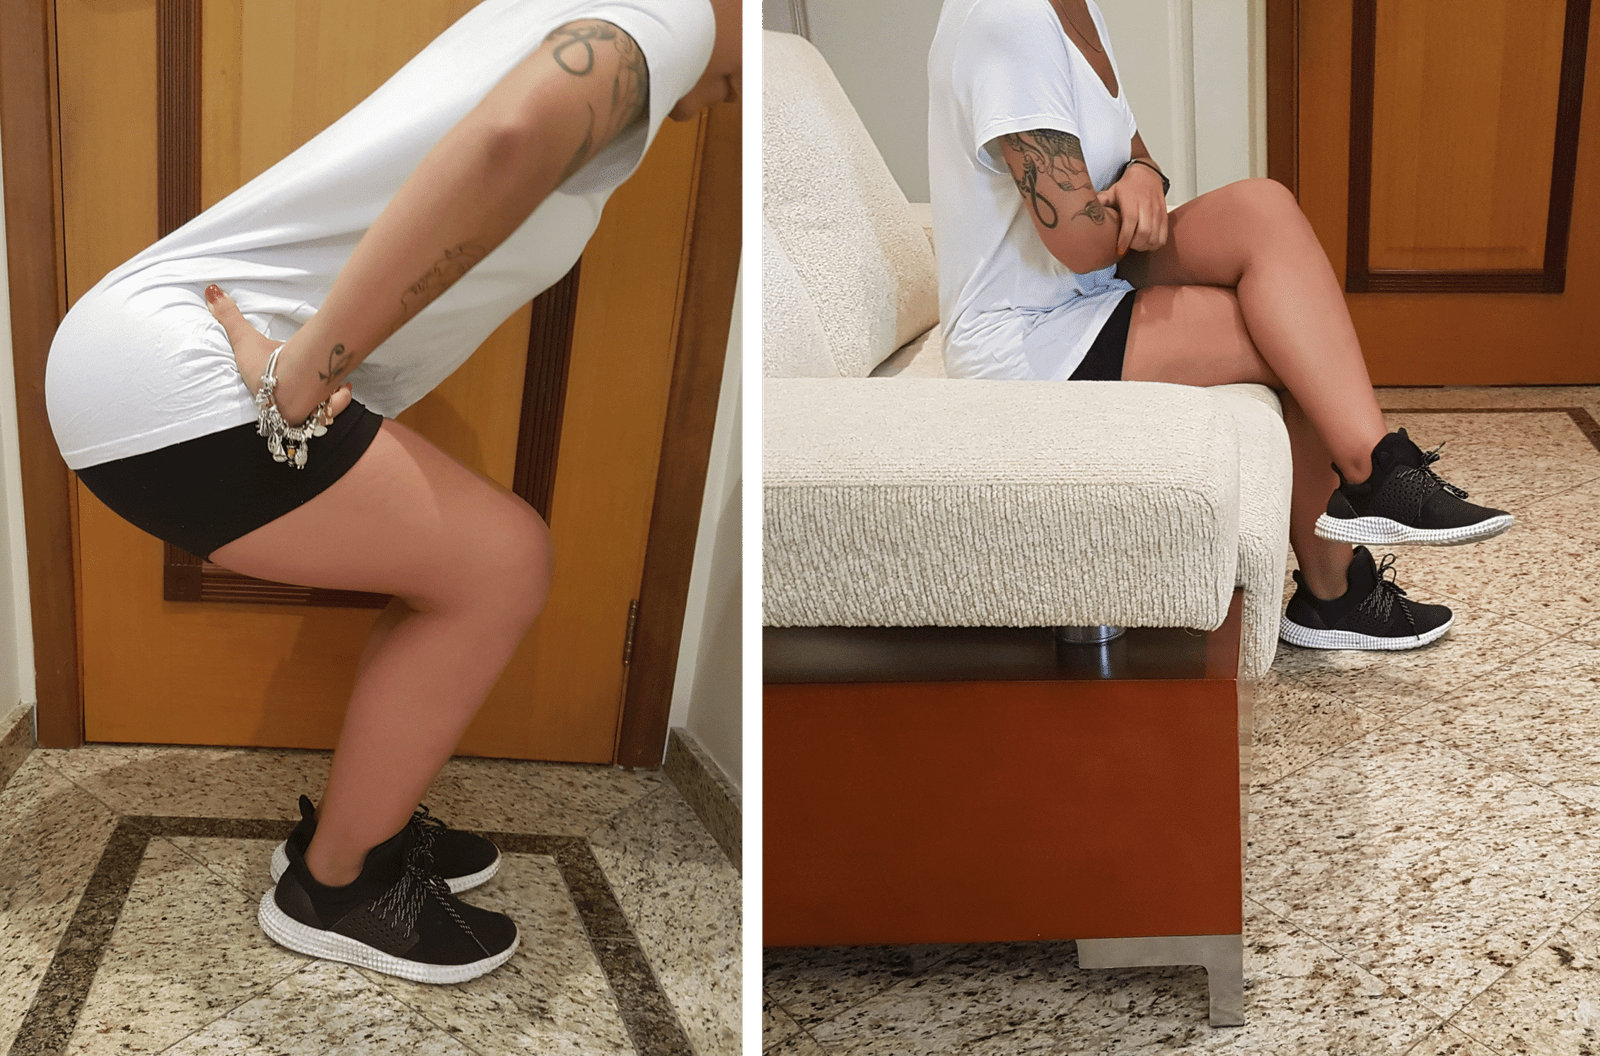
Endoprosthesis Implantation Technique for Replacing the Proximal Third of the Tibia


Video 1: We complete the regularization of the osteotomies in order to obtain flat and perpendicular surfaces to the cuts, guaranteeing the perfect adaptation of the prosthesis components.
Video 2: After removing the interference bolt and the cross pin, we put the two polyethylene bushes out of the chamfer.
Video 3: After fitting the second bushing, we continue assembling the rotational component with the femur segment.
Video 4: We place the rotational pin with the chamfer facing forward to make it easier to place the locking pin.
Video 5: By slowly turning the rotational pin with a wrench, we find the orientation of the thread to secure it with the locking screw.
Video 6: With the slot aligned, we fix the locking screw in the slot of the rotational pin.
Video 7: We loosen the fixing screws on the femoral stem to fit it correctly.
Video 8: We compact the stem socket, which is slightly conical, with two to three strokes.
Video 9: After impaction, we tighten the screws of the femoral component, firmly locking the proximal stem.
Video 10: We now loosen the locking screws of the tibial component and the extension segment, which in this case is 3.0 cm, in order to assemble the planned component. We previously positioned the face that simulates the tibial crest line, in order to improve the orientation of the correct rotation during cementation.
Video 11: We also compacted the tibial stem and tightened all the locking screws on both the tibial component and the extension segment, firmly securing the entire assembly.
Video 12: We start cementing the tibia first, leaving a tube of saline to rinse out the entire canal and pressing the cement in well to ensure that the prosthesis is well fixed. It is important to press the cement well, especially when we don’t have a pressurizer, which allows the cement to be filled from the bottom to the surface. The tibial prosthesis is inserted, orienting the anterior surface of the prosthesis with the alignment of the second metatarsal.
Video 13: To cement the femoral component, we clamp the diaphysis with Spanish forceps and place an IV bag to drain the medullary canal, removing air and any remaining blood. We continue to pay attention to filling the canal, remove the saline bottle and complete the manual pressurization of the cement, ensuring that the femoral canal is completely filled. We then inserted the femoral component stem, guiding the team to ensure correct alignment. Manual placement of the cement can accelerate its hardening, and it is sometimes necessary to apply force to complete the placement of the femoral component. Remove excess cement and check alignment. We must maintain compression and the limb aligned during the remaining minutes of cement expansion until it dries completely, ensuring that rotational alignment is maintained.
Video 14: With the limb at 90 degrees, we perform a slight traction and fit the components, completing the reduction of the new knee. Keeping the patella in the femoral groove, we tested the flexion-extension and coverage of the prosthesis, also assessing the closure of the surgical wound.
Video 15: Patient operated on more than 7 years ago, cured, with normal ambulation, no claudication, good gait and excellent function.
Case Author
Author: Prof. Dr. Pedro Péricles Ribeiro Baptista
Orthopedic Oncosurgery at the Dr. Arnaldo Vieira de Carvalho Cancer Institute
Office : Rua General Jardim, 846 – Cj 41 – Cep: 01223-010 Higienópolis São Paulo – SP
Phone: +55 11 3231-4638 Cell:+55 11 99863-5577 Email: drpprb@gmail.com